Showing posts with label DIY. Show all posts

Tuesday, March 15, 2011

Virginia Maid by Lane

I get very excited when I hear the word "Lane" together in the same sentence as "cedar chest."
-
-
WARNING: My point and shoot camera apparently needs an EXTREME cleaning! Sorry, I didn't notice before taking these pictures...
-
-
Here is the inside. Both Lane cedar chests that I own, have a tray which I love!
-
-
They look completely different from one another! This looker has straight lines and a low height which I adored the minute I laid eyes on it. Tiana and I were at an auction and this beauty had to come home with us and for 25 clams, we gladly loaded her up!
-
-
I love her lines, but not the scratches on top of her lid... Looks like it was used as a drawing table and there are many battle wounds.
-
-
So I got to sanding this weekend! 40 minutes later...
-
-
Her lid looks brand spanking new! I will continue to work on her these coming weeks with some other projects... and I will keep you all posted of course! :)
-
Happy Tuesday!
-
I promise to clean my camera before next time!

Tuesday, March 1, 2011

Chair Makeover

Okay, so I was going to save this for later this week, but after finishing it last night - I just can't contain myself!!!
-
-
Last year, mom & I spent lots of time searching for the perfect chair for Tiana's senior pictures... low and behold we found it! It was perfect! But because Tiana is so stunning, you hardly even notice the chair. :) So after the pictures were taken, this chair went straight into a corner in my dining room and was hardly seen.
-
-
So it was time to make this beauty stand out! You know what the means! Thrift store makeover!!! So here is the before...
-
-
-
-
-
Now it is time to see the after!
-
-
-
-
-
She is now highly noteworthy!
-
-
-
-
-
My favorite makeover to date!
-
-
-
-
-
Are you ready!?
-
-
-
-
-
I can't hear you!
-
-
-
-
-
Okay seriously, a little more scrolling!
-
-
-
-
-
Here it comes!
-
-
-
-
-
-
Ta Da! Isn't she gorgeous!? I took no pictures of the process... so the Before & After will have to suffice!
-
-
First, I started by tearing her apart and removing all the cushions. Then came a coat of primer and two coats of white spray paint. I bought the green fabric at JoAnn's.
-
-
Instead of making new buttons, I just painted the old ones! This chair won't get a whole lot of actual use, so the painting option seemed perfect. Chris helped me put all the pieces back together cause two hands were not enough. (This meant that I got to use the power stapler, love it!) To finish it off, I covered the staples with rope from Walmart.
-
-
For a last pop of color, I painted the grooves in the front the same color as the buttons. I love how this project turned out! She will live in the new guest room, once I have it completed of course! Hope you enjoyed seeing it! Have a Very Happy Tuesday!!!

Monday, February 28, 2011

Knob Makeover

After our wedding in September, we had quite a few bottle stoppers left over. I gues our count was off a tad, but oh well - more for us! At least that is what we thought... There is only so much you can do with heart stoppers, and they are not always the right choice for gifts... so we decided to transform them.
-
-
During a visit to our local Habitat store, I spotted these... and it was a total light bulb moment! So with the hubby's help (I'm not allowed to run the welder), we transformed bottle stoppers and knobs into...
-
-
Unique and conversation starting stoppers! I want to paint the copper piece, but Chris likes them this way. Now I am on a hunt for more knobs that I can surely whip the spray paint out for!
-
-
Here's to taking what you've got and giving it new life! More projects to come. Happy Monday!

Sunday, January 30, 2011

Going Gray

Welcome to "The Blue Room"
-
-
Our guest room has been refered to as The Blue Room since we arrived. It was the previous owner's boys room and is a very little boy blue room.
-
-
A little room with a twin bed, random boxes and part of a TV. Time to give this room a new color and make it truly serve its purpose.
-
-
So we are going gray! Dutch Boy's Eco Gray to be exact. All the tim will get a fresh coat of Dutch Boy's Ultra White. Because the walls will be lack of color, the intention is to add accent colors around the room... To start I picked up sample colors of four Pittsburgh Paints - Willow Herb, Tapestry Teal, Madeira Red and Love Potion. The plan is to incorporate them into some DIY wall art for a punch of color. But that is down the road so back to business!
-
-
For starters the make shift closet. Now I can appreciated some of the work around the house that the previous owner had done, but most things were done in a lackluster way. Take note of this closet. First, this closet is not original. This room used to be larger but then someone decided to put in an additional closet in what is now the master bedroom. Then they left this little nook in the guest room, and converted it into a mini closet that has left a lot to be desired. Take note that the finishing does not go all the way to the ceiling, nor did they finish it to the floor.
-
-
So the plan for this weekend was to simply paint this room. We ended up ripping our the closet and then thought we would fix all the mismatched baseboard as well, so we tore all of that out. We are those people who can't just do a simple painting project, we will find other things to fix!
-
-
My next job was to remove all of the nails from the old baseboards. Tideous, but necessary. On the upside, surprises can be found in even the most mundane tasks.
-
-
See this. I don't know if I have mentioned this before, but our house turns 100 years old this year! So while we were ripping off baseboards, we came across some that were original and on the back of one was a shopping list.
-
-
Okay back to the original task of the day. Let's help this room go gray!
-
More updates to come!

Thursday, January 6, 2011

Bitter Sweet

I thought it would finally be time for me to display one of my holiday decorations. Last summer at an auction, yes the one that did THIS to my garage, I ended up buying a box for some fancy-shmancy dishes and ended up getting a couple old doilies. Wondering what to do with them, I browsed the internet for doily projects. And feel in love with one!
-
I have been grabbing spare doilies from everywhere all year! Friends, grandma, garage sales, thrift shops, surprisingly - they are very hard to find! Finally I had enough to do for now...
-
Then I got an idea for a great new table! So I waited and waited, as patiently with little toe tapping as I could for the hubby to help with the table. Two weeks before Christmas, I burst out one night, "Will the table be done for Christmas!?" The answer was no.
-
So, I decided that my doily project would have to go on my not so pretty table... fine. I'll suck it up! {But I'm not going to be happy about it...}
-
-
Meet my sad, old, plain, veneer topped, metal legged, yawn table... sigh... okay, pity party over, let's jazz her up!
-
-
Here are the said doilies mentioned above, and the only other supply I needed... floss!
-
-
First I laid them out on the table, in a fashion that pleased me... not hard to do with all that white and creamy crocheted happiness!
-
-
Last, you tie the delicate beauties together and snip off the extra floss... are you ready!?
-
-
Pow! One super schnazzy doily project all dressed up for Christmas! Now imagine a big bouquet of flowers in the spring or a pumpkin and acorns in the fall... woo hoo, multi-use project. {Would be even better if the boy would help me with my table project. Honey, I hope you're reading this, love you!}
-
The title is "Bitter Sweet" because I insist this project would have looked better, but in reality I love it so much, I could care less what table it was on!
-
Next step, add more doilies as I find them and turn it into a full table runner, with homemade gorgeousness flowing over the edge of the table! Like the one I found that sent me on the doily mission this summer, you can see it HERE (you may have to scroll through some of the photos in the bottom right). Did you find it!? Love it!
-
My sincerest apologies for all the "excitement" in today's post, I'm in a GREAT mood and I'll explain it all very soon! No, it's not the table :-) Happy Thursday!

Tuesday, December 28, 2010

Sweet Sweater Pillows

So the holiday season is beginning to slow down, finally... only one more Christmas to go this weekend, but... the newsman has dubbed a storm brewing to hit this weekend, "The Storm of the Century."
-
So, I thought that if we do get a good old fashioned stay indoors blizzard, I could count on getting some more projects done... then I figured I should blog about some of the projects that got accomplished during the last snow storm... hence today's post!
-
While buckled down a few weeks back (and three bottles of wine into the day) I decided to whip out some thrift store finds and make some sweater pillows I have been dying to have!
-
-
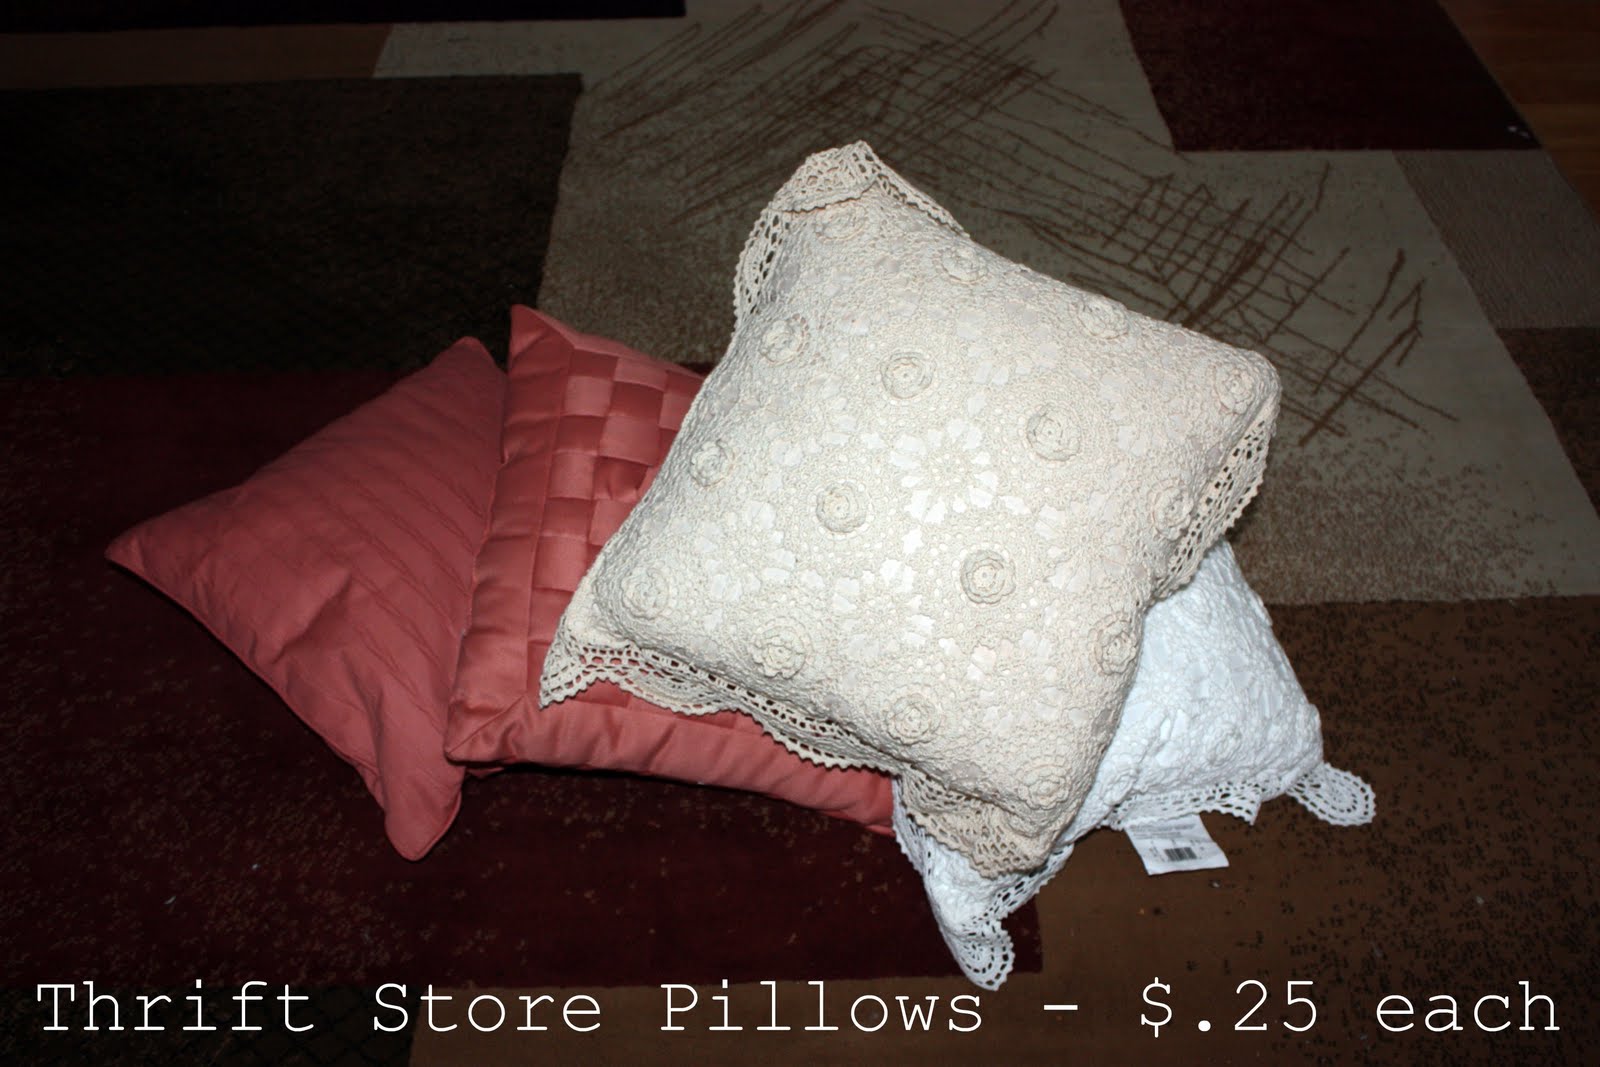
When planning to make pillows, I find that buying stuffing can be spendy... so at the local thrift store I decided to buy pillows that passed the sniff test (and don't forget to wash them, too!) for only $.25 a piece.
-
-
Then I picked out some sweaters to use as the fabric for the pillows. I grabbed shirts that went with my color scheme and the bigger the better! Bring on the Men's XXXL!
-
-
First, I washed the pillows and the sweaters! Then I turned the pillows inside out... drew my pillow shape onto one side... pinned both sides together... and cut threw both sides at once!
-
Headed to the sewing machine and stitched away, leaving a small area to stuff the pillow. After it is stitched, flip it right side out, rip your thrift store pillows open and stuff your new pillow! Then hand stitch your filling hole shut!
-

-
Ta Da!

-
Three sweater pillows for pennies! Note that you shouldn't operate a sewing machine after drinking wine, your pillows will not be perfectly square... but if that is how you cope with snow days, I understand! :-)
-
Happy Thrifting!

Thursday, December 16, 2010

Do You See What I See!?

Wow... my blog has got to be the most boring place on the internet right now! Talk about disappointing... anywho, that is about to change! Combined with being snowed in last weekend, and a full week of vacation next week, I've got things to post!
-
-
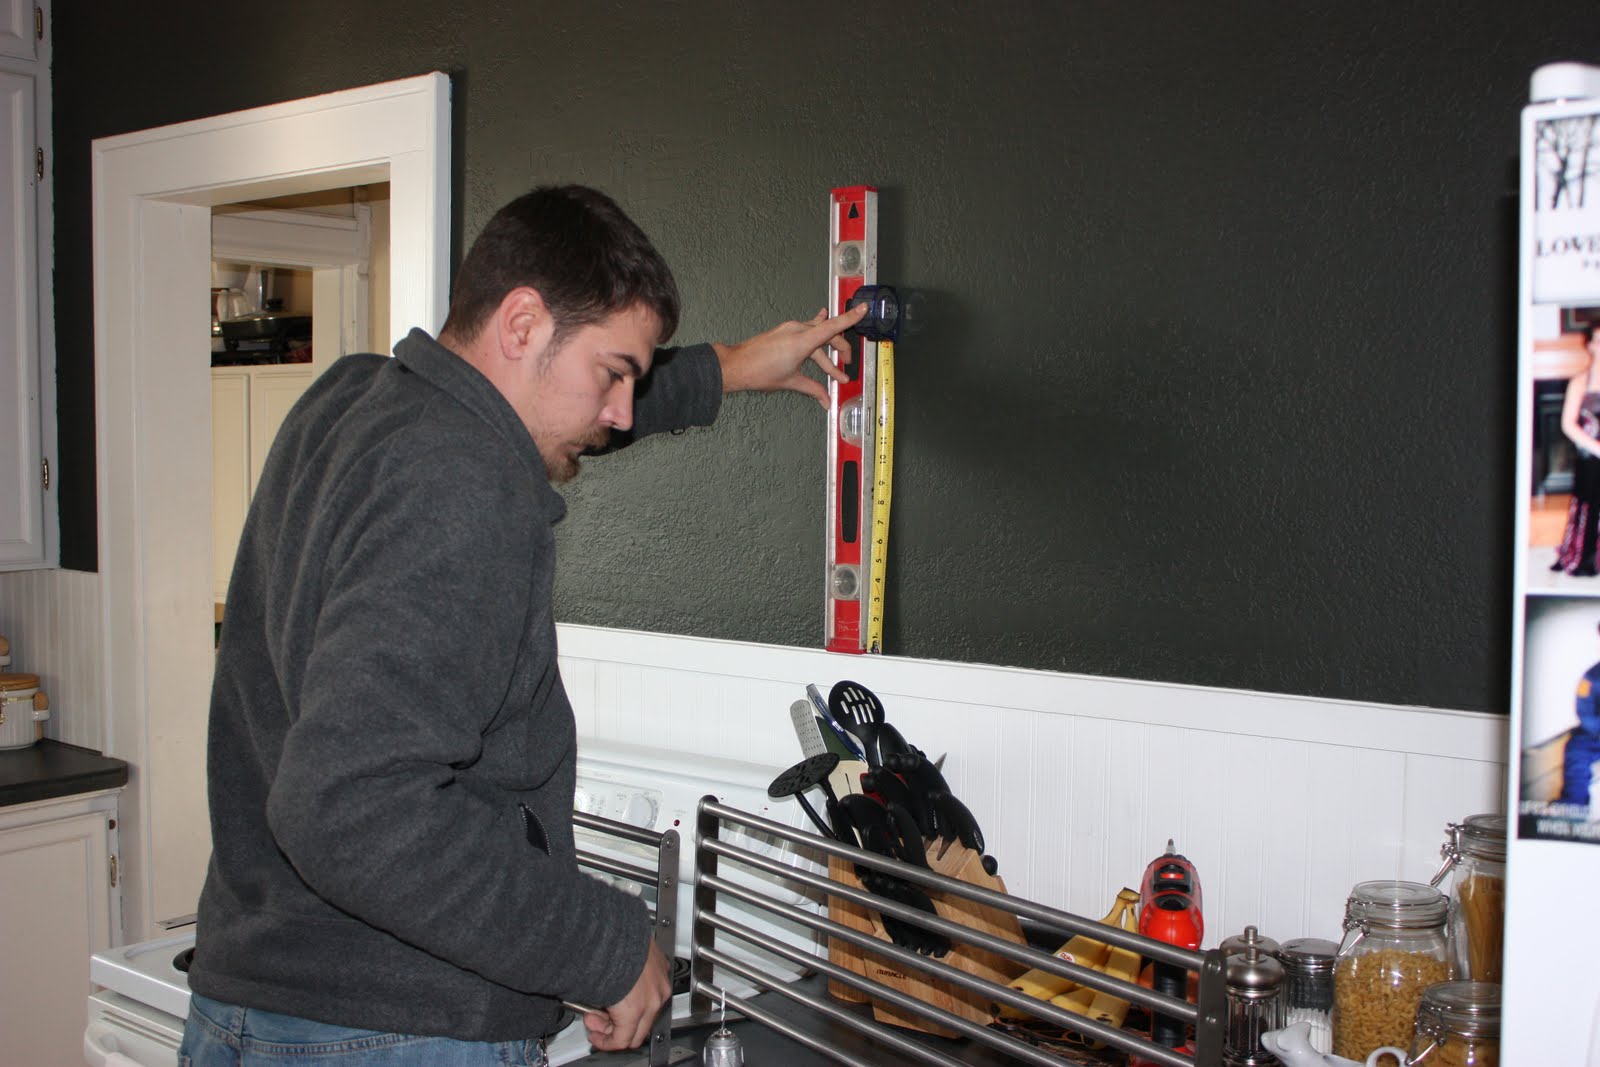
First and foremost, do you see what I see? Majorly cluttered counter and a HUGE empty wall! Well last summer, I got shelves to put on them naked walls... and they have sat in my dining room since... well not anymore! Enter a snow day, three bottles of wine and a nagging wife (aka ME) - and things get done!
-
-
Start with some measuring and leveling...
-
-
Some marking and more leveling...
-
-
Bring in the drill and...
-
-
Ta Da!!! Prudy new shelves and a much cleaner counter! I took me all of five seconds to fill the shelves once Chris was done! Not only eye catching, but super useful!
-
-
Left Shelf
-
-
Right Shelf
-
I (((heart))) IKEA!!!
-
Apologies for the dirty camera and whacky focusing... I'll blame it on the wine!

Wednesday, November 10, 2010

Quick Project!

Okay, so no Wednesday Wishes today... lately, I have been really busy getting the house ready for the holidays. We have family gatherings at our house and I want to ensure that we are being festive, and not breaking the bank!
-
So my focus has been on just that (and maybe a wish here and there, but more on that another day)! Hence my new rug!
-
-
I started with a rug that I bought for $6.97 at Walmart, cause I wanted something cheap outside the front door. While looking at it I figured there had to be some that didn't cost anything to do that could make it a little more spiffy! *Light Bulb* I had seen lots of monogrammed rugs lately, so that sounded like the way to go!
-
-
Step one, trace your plate. Then go grab some paint and a brush! 20 minutes later...
-
-
Here she is! Isn't she a sight for sore eyes!? Sorry for the few and poor pictures, I was just super excited so didn't take many photos and it was still dark out this morning when I went to work, so I will have to take a picture of it outside this weekend!
-
Side Note: Chris has been continually picking on me for my insistence of using the letter "H" throughout our house. Last night, I had to finally admit I like it so much because it is symmetrical... oh the shame... I married for symmetry! :-D

Friday, November 5, 2010

The Big Picture

So all of this week's little projects, were part of my "big picture". For years Chris and I have had what I dubbed the "college" bedroom. You know, basic bed and makeshift nightstands... It was definitely time for a change!
-
-
So here are the before pictures, pretty boring I'd say!
-
-
My nightstand was a disaster area, enough said...
-
-
The hubby's nightstand was my leftover tool cabinet, that really only held his wedding ring and an occasional cellphone at night...
-
-
The hardwood floor (identical throughout the house), is gorgeous, but chilly in the morning...
-
-
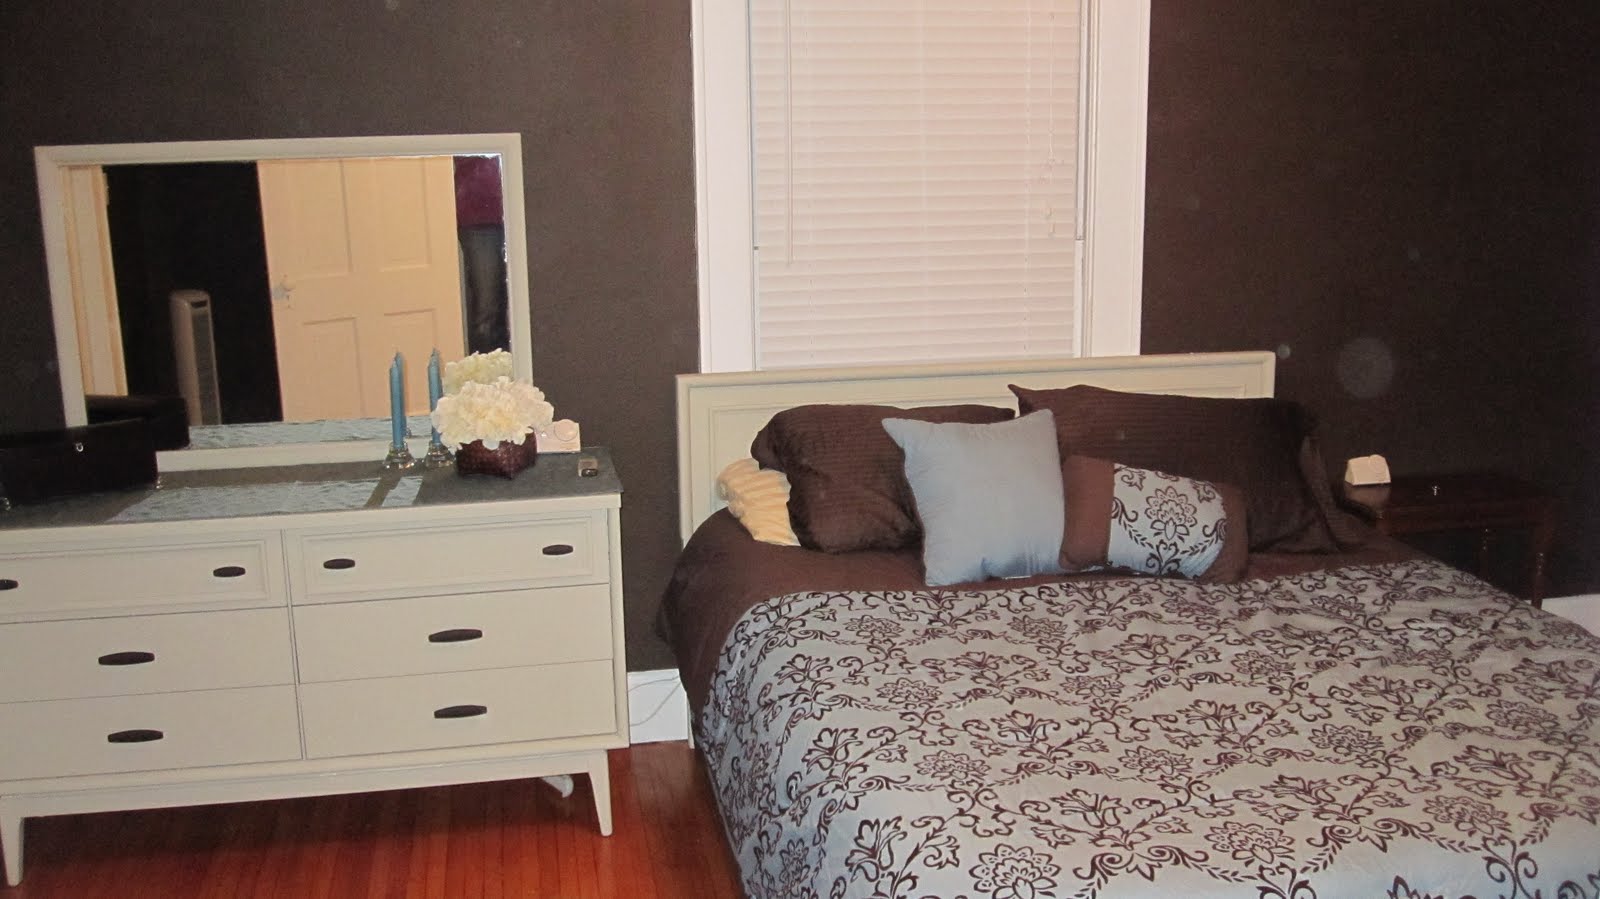
Here is the final product (sorry the camera seems to be dirty)! Ta Da! A "Grown-Up" bedroom! Here you can see our new comforter, purchased with a Target gift card from the wedding (thanks Jennifer!) and my new dresser/mirror/headboard! I am loving that my pillows no longer fall down into the window, yay for headboards!
-
-
I had some canvas prints sitting in a closet downstairs, so they emerged and made it to the bedroom wall...
-
-
Here is the hubby's new nightstand... I actually purchased this at an auction this summer also. No need to refinish, because I think it is perfect the way it is! And the gorgeous wire basket just tops it off! (Oh and the little white box on top is the controller for his side of the heated mattress pad, figured it was about time to pull it out of storage and get that puppy warmed up!)
-
-
A shot of the finished dresser from yesterday's post and a rug that was given to me as a shower gift (thanks Beth!), love it! The "H" frame from Tuesday's post is actually on the wall to the left, didn't realize I cute it out of the picture, sorry.
-
-
Lastly, a couple more decorations. Candlesticks from Ikea $0.50 each, candles from Walmart $0.89 each. Basket was already owned and the silk hydrangeas are from the wedding. Oh and the blue clothe on top of the dresser I dug out of a drawer downstairs, so I quickly stiched up the edges and threw it on! Hope you enjoyed this week, I am excited to be working on some more projects this weekend so I better get cracking! Happy Friday!
-
Bedroom Project Breakdown:
Dresser/Mirror/Headboard - $11.33
Comforter - Gift
Canvas Prints - Had on Hand
Hubby's Nightstand - $2.00
Wirebasket/Filling - $0.75
Rug - Gift
"H" Frame - $3.57 (to make the one)
Candles/Sticks - $2.78
Basket/Flowers - Had on Hand
Blue Fabric - Had on Hand
Project Total - $20.43