Tuesday, December 28, 2010

Sweet Sweater Pillows

So the holiday season is beginning to slow down, finally... only one more Christmas to go this weekend, but... the newsman has dubbed a storm brewing to hit this weekend, "The Storm of the Century."
-
So, I thought that if we do get a good old fashioned stay indoors blizzard, I could count on getting some more projects done... then I figured I should blog about some of the projects that got accomplished during the last snow storm... hence today's post!
-
While buckled down a few weeks back (and three bottles of wine into the day) I decided to whip out some thrift store finds and make some sweater pillows I have been dying to have!
-
-
When planning to make pillows, I find that buying stuffing can be spendy... so at the local thrift store I decided to buy pillows that passed the sniff test (and don't forget to wash them, too!) for only $.25 a piece.
-
-
Then I picked out some sweaters to use as the fabric for the pillows. I grabbed shirts that went with my color scheme and the bigger the better! Bring on the Men's XXXL!
-
-
First, I washed the pillows and the sweaters! Then I turned the pillows inside out... drew my pillow shape onto one side... pinned both sides together... and cut threw both sides at once!
-
Headed to the sewing machine and stitched away, leaving a small area to stuff the pillow. After it is stitched, flip it right side out, rip your thrift store pillows open and stuff your new pillow! Then hand stitch your filling hole shut!
-

-
Ta Da!

-
Three sweater pillows for pennies! Note that you shouldn't operate a sewing machine after drinking wine, your pillows will not be perfectly square... but if that is how you cope with snow days, I understand! :-)
-
Happy Thrifting!

Thursday, December 16, 2010

Do You See What I See!?

Wow... my blog has got to be the most boring place on the internet right now! Talk about disappointing... anywho, that is about to change! Combined with being snowed in last weekend, and a full week of vacation next week, I've got things to post!
-
-
First and foremost, do you see what I see? Majorly cluttered counter and a HUGE empty wall! Well last summer, I got shelves to put on them naked walls... and they have sat in my dining room since... well not anymore! Enter a snow day, three bottles of wine and a nagging wife (aka ME) - and things get done!
-
-
Start with some measuring and leveling...
-
-
Some marking and more leveling...
-
-
Bring in the drill and...
-
-
Ta Da!!! Prudy new shelves and a much cleaner counter! I took me all of five seconds to fill the shelves once Chris was done! Not only eye catching, but super useful!
-
-
Left Shelf
-
-
Right Shelf
-
I (((heart))) IKEA!!!
-
Apologies for the dirty camera and whacky focusing... I'll blame it on the wine!

Wednesday, December 8, 2010

Wednesday Wishes

Hello Again! Time for a Wednesday Wishes post!
-
Lately, I have spent a lot of time looking at pillows. I am pretty sure I can make my own, but wanted to get ideas on all types of pillows. See I am looking for pillows for the couch, ottoman, beds, different chairs and even floor pillows. With the holiday season quickly approaching, I am feeling some pressure to get this completed. So I turned to one of my favorite sites for inspiration, Etsy!
-
Low and behold, I came across Alexandra Ferguson's shop, my goodness! I had seen her work earlier this year in one of my 'Real Simple' magazines... She will definitely leave you saying, "ooh la la!"
-
-
Alexandra creates handmade pillows with 100% recycled felt (saving at least 4 bottles from headed to landfills) stitched into sassy statements and decorative motifs.
Have to love a green product!
-
-
Her creations make me smile. The monograms are to die for!
-
-
And all of her other products, well you get the idea...
-
-
I start to consider turning some of these into a DIY project, but for now I will just continue to droll... Okay, time to focus and get thinking about pillows that I can actually accomplish pre-holiday gatherings.
-
Happy Wednesday!

Tuesday, December 7, 2010

Happy Birthday Munchkin!

To those who may not know, my baby sister turned 18 today! But she will always be my little munchkin. Love you Tiana!
-
-
Photo taken/edited by me during one of our shoots a few weeks back.

Tuesday, November 30, 2010

Ornament Hunt

Alright, I have heard that it is time for another post! I am receiving emails and verbal commands to post something, I was actually a little shocked at how many people read this - thought I was mainly talking to myself! So I thought I would include you in a little of my holiday happenings! Working on decorating and a couple projects right now, but recently I have begun my annual ornament hunt!
-
-
There are so many to choose from, but I thought I would post a couple of my favorites - like this Pewter Mistletoe from Improvements for $19.99! What a beauty!
-
-
For those who may not know, each year Chris & I get each other one gift - an ornament that we open together Christmas morning! So now my mission has begun! (Extra Note: last year my engagement ring was attached to my snowflake ornament, that is how Chris asked me to marry him)
-
-
I have been browsing everywhere! I love the Hallmark ornaments, always feels like a memento. Love, love, love the new home bird house!
-
-
Even headed to West Elm and I'm digging the mercury glass pears!
-
-
Love the thought of this, it is an Engraved Glass Medallion from Garnet Hill (Retail $95). It is way out of my price range, but looks like it could be a DIY project! I think I struggle finding an ornament every year because I am looking for what I want, not the hubby... maybe time to refocus... or, just buy him the one that I like!
-
Happy Tuesday - I'll be back soon!

Thursday, November 11, 2010

Thankful Thursday

So today will be Thankful Thursday, for at my aunt Marsha's blog she has a gratitude challenge going on... and I thought that today seemed like a great day to participate!
- -
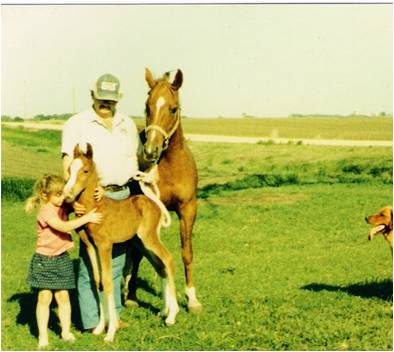
1. Today I am thankful for my dad. While most know November 11th as a day a remember our veterans, to me it has always been a day to celebrate my dad! Today is his birthday and this man has truly always held my heart. He is always there when needed and offers the best advice! Always a rock! (How can you not adore a dad who actually got you the pony!?) Love you!
-
2. With as busy as work has been the past couple of weeks, I am thankful for caffeine... this is one thing I wouldn't know what to do without.
-
3. Lastly, today I am thankful for Netflix. Today is Thursday... this means a night off. (Well at least most of the time, and tonight it definitely will be!) Make supper when I get home, then The Big Bang Theory & $#*! My Dad Says and then Netflix! 9 out of 10 times we stream instantly to our TV, so tonight we are going to watch some more of the show Weeds (hilarious) and chow on some popcorn! The hubby also refers to this time as "couch project time" usually some sort of projects in my hands while choking on popcorn because I'm laughing too hard... darn Weeds.
-
Another one just for dad, happy birthday!
-

Wednesday, November 10, 2010

Quick Project!

Okay, so no Wednesday Wishes today... lately, I have been really busy getting the house ready for the holidays. We have family gatherings at our house and I want to ensure that we are being festive, and not breaking the bank!
-
So my focus has been on just that (and maybe a wish here and there, but more on that another day)! Hence my new rug!
-
-
I started with a rug that I bought for $6.97 at Walmart, cause I wanted something cheap outside the front door. While looking at it I figured there had to be some that didn't cost anything to do that could make it a little more spiffy! *Light Bulb* I had seen lots of monogrammed rugs lately, so that sounded like the way to go!
-
-
Step one, trace your plate. Then go grab some paint and a brush! 20 minutes later...
-
-
Here she is! Isn't she a sight for sore eyes!? Sorry for the few and poor pictures, I was just super excited so didn't take many photos and it was still dark out this morning when I went to work, so I will have to take a picture of it outside this weekend!
-
Side Note: Chris has been continually picking on me for my insistence of using the letter "H" throughout our house. Last night, I had to finally admit I like it so much because it is symmetrical... oh the shame... I married for symmetry! :-D

Friday, November 5, 2010

The Big Picture

So all of this week's little projects, were part of my "big picture". For years Chris and I have had what I dubbed the "college" bedroom. You know, basic bed and makeshift nightstands... It was definitely time for a change!
-
-
So here are the before pictures, pretty boring I'd say!
-
-
My nightstand was a disaster area, enough said...
-
-
The hubby's nightstand was my leftover tool cabinet, that really only held his wedding ring and an occasional cellphone at night...
-
-
The hardwood floor (identical throughout the house), is gorgeous, but chilly in the morning...
-
-
Here is the final product (sorry the camera seems to be dirty)! Ta Da! A "Grown-Up" bedroom! Here you can see our new comforter, purchased with a Target gift card from the wedding (thanks Jennifer!) and my new dresser/mirror/headboard! I am loving that my pillows no longer fall down into the window, yay for headboards!
-
-
I had some canvas prints sitting in a closet downstairs, so they emerged and made it to the bedroom wall...
-
-
Here is the hubby's new nightstand... I actually purchased this at an auction this summer also. No need to refinish, because I think it is perfect the way it is! And the gorgeous wire basket just tops it off! (Oh and the little white box on top is the controller for his side of the heated mattress pad, figured it was about time to pull it out of storage and get that puppy warmed up!)
-
-
A shot of the finished dresser from yesterday's post and a rug that was given to me as a shower gift (thanks Beth!), love it! The "H" frame from Tuesday's post is actually on the wall to the left, didn't realize I cute it out of the picture, sorry.
-
-
Lastly, a couple more decorations. Candlesticks from Ikea $0.50 each, candles from Walmart $0.89 each. Basket was already owned and the silk hydrangeas are from the wedding. Oh and the blue clothe on top of the dresser I dug out of a drawer downstairs, so I quickly stiched up the edges and threw it on! Hope you enjoyed this week, I am excited to be working on some more projects this weekend so I better get cracking! Happy Friday!
-
Bedroom Project Breakdown:
Dresser/Mirror/Headboard - $11.33
Comforter - Gift
Canvas Prints - Had on Hand
Hubby's Nightstand - $2.00
Wirebasket/Filling - $0.75
Rug - Gift
"H" Frame - $3.57 (to make the one)
Candles/Sticks - $2.78
Basket/Flowers - Had on Hand
Blue Fabric - Had on Hand
Project Total - $20.43

Thursday, November 4, 2010

Back At It

Okay, Wednesday's post didn't happen... oh well, I try the best I can, Wednesdays just seem to be hard for me cause there are so many important things to do... like watching Survivor (that darn Naonka needs to go home).
-
Anywho, back to project week. I am very excited about this one! Last summer I went to an auction and scored this beauty below for $6!
-
-
When getting ready to leave, we went to put this in the truck and found out that not only did I buy a dresser, but it came with a mirror and a headboard, it was a little bonus that I had not known. So we threw it all in the truck and headed home.
-
-
So, Chris helped me unload this find in the garage and that is where it has sat since last June. I would occasionally stand over it, head tilting side-to-side to figure out what I was going to do with it... we needed a dresser... and because I am cheap, scratch that, "frugal" this is the one we will use, just what to do to it... I began scouring the internet for ideas and tips on how to paint laminate.
-
The wedding took place on September 18, and the following weekend I got down and dirty with this 70's charmer.
-
-
Started off with taping off the mirror, plenty wide cause I am not the neatest painter...
-
-
Then came the primer. I used Zinnser's oil based primer, I love using this primer because it requires no sanding! That's right, you heard me, NO SANDING! That is the one part about painting projects that I despise... So for this project, I applied two coats of primer. This primer also dries in two hours, so I was able to do both coats the same evening. Just remember that it is oil based, so you will need paint thinner to remove it off of anything... hands... brushes... husband's shoes... whoops!
-
-
After the primer came the paint! I chose Dutch Boy's Colonial Cobblestone. And, I only bought the sample size can... no need to buy a gallon, when I only used 1/2 of the quart size sample!
-
-
I applied three coats two each piece of the set and loved the result!
-
-
I debated buying new hardware, but decided I sort of liked the original, they just needed a new coat of paint, so I dug around and found a brown. It was actually Krylon's Camouflage Paint, it worked out beautifully!
-
-
Here is a sneak peak of the finished result... I will be back to combine this week of projects into one big project tomorrow! See you then!
-
Dresser Project Breakdown:
Dresser/Mirror/Headboard - $6.00
Zinnser Primer - Had on hand
Dutch Boy Sample - $5.33
Krylon Camouflage - Had on hand
Project Total - $11.33

Tuesday, November 2, 2010

From Goodwill to Gorgeous

Are you ready for another Goodwill score!?
-
-
Check out the pictures that I came across! Look at those amazing frames! Lets tear them apart!
-
-
To start we disassemble! Then the frames go off to the garage for... white spray paint of course!
-
-
While the paint is drying, lets take a look at the pictures... they were not in the best of shape and really don't go with my decorating scheme... so lets grab some supplies!
-
-
First, use your spray adhesive to adhere the fabric to the pictures. I let it dry for a minute or so before sticking together... it seems to make it a little more "tacky" and you get a better hold. Then trim about an inch all the way around.
-
-
Then I clipped the corners, sprayed the edges of the pictures and folded the material around the backside.
-
-
For the corners, I folded them together to form a little dog ear.
-
-
Next, I clipped off the dog ears.
-
-
This creates a nice clean look on the back... call it the perfectionist in me!
-
-
Here are the finished pictures! Now lets go get the pretty white frames!
-
-
Oh, now don't they look just scrumptious! What to do with them... hmmm... well being a newlywed, I have grown fond of the letter "H" - so that would be a good start for one!
-
-
A bright white H sure does the trick! Held in place with a little hot glue (so I can change it later if I'd like)... Love It!
-
Maybe we will see the second frame sometime in the future... for now, it will go with the other frames that have yet to find a home in this house!
-
Picture Frame Project Breakdown: Picture Frames from Goodwill - $2.00
White Spray Paint - Had on hand
Spray Adhesive - Had on hand
Canvas Fabric from JoAnn - $3.35 (on sale, yay!)
Wooden H from Walmart - $0.89
Project Total - $6.24